Shooting a film or a television show comes with a variety of hurdles – not least of which is background noise. You can shush the crew and find a location away from busy streets, but incidental noises have the potential to ruin your take. A plane flying overhead, a sudden commotion, a failing microphone – you can’t always fully control your environment.
The good news is, there’s no need to scrap an entire sequence simply because a dog keeps barking nearby, making it hard to hear an actor speak. That’s what ADR is for. From accidental mumbling to a fluffed line, we’ll delve into how ADR can save your shoot.
JUMP TO
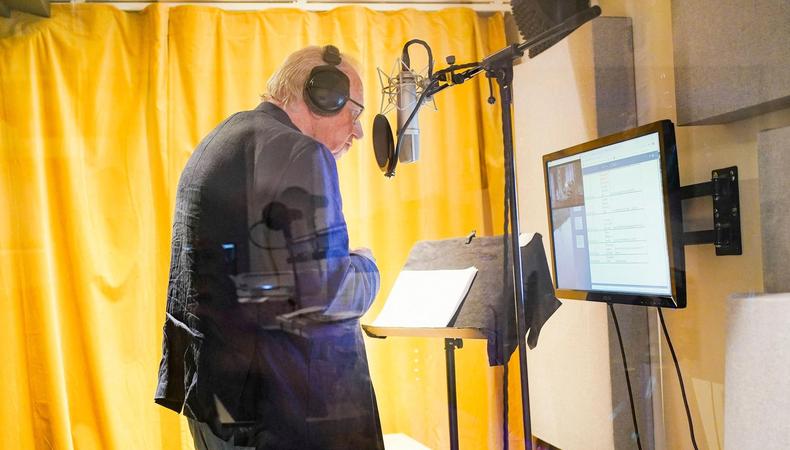
ADR stands for “automated dialogue replacement,” but it’s also known as “additional dialogue recording” or “looping.” It’s a filmmaking technique that’s applied during the postproduction process that essentially involves re-recording audio in order to replace the original microphone feed. It usually takes place in a recording or postproduction studio that’s specifically set up with a screen and a sound booth.
There are many benefits of ADR audio. It can fix incidental noises and line slip-ups, but it can also be used for other ends. The controlled environment of an ADR session allows the actor and the director to solidify a performance that might have been impacted by an array of circumstances. Here are a few situations in which ADR would be used.
Inaudible dialogue
Sometimes your surroundings affect the sound that’s detected by the microphones, especially when shooting outside on location. Uncontrollable elements such as weather, traffic, animals, or even noises made by the crew can make the dialogue difficult to hear. Shooting days are quite fast-paced, you may not always have time to reshoot, or you may not even notice that the audio quality isn’t the best. Opting to use ADR can save you time and money, since it’ll be cheaper to separately re-record the sound than block out further hours on set.
Making the dialogue clearer
Unless you’re shooting a scene in which everyone is standing perfectly still, movement will alter the audio feed. The rustling of your clothes as you walk, the handling of props, or a misplaced microphone will mess with the sound levels. The overlapping of dialogue and physical activity can be a huge issue in the editing stage too. Fight scenes are a prime example. The actors’ exertion may make their lines hard to understand, and the proximity of their bodies may distort their microphones. Having them re-record their sides enables the performers and the director to focus on the physicality of the scene without worrying about the acoustics of their performance.
Accents and inflections
Maintaining an accent throughout a performance can be hard work if it’s not your native one. Practising and fully immersing yourself in the role will help you deliver a convincing performance, but slip-ups still happen. Acting the dialogue, especially when it involves screaming or crying, may lead you to revert briefly to your natural way of speaking. An ADR session allows you to fix your mistakes by consolidating your vocal performance.
Wide shots
Some projects involve wide, establishing shots. The director positions the camera equipment far away from the subjects in order to set up the action, which may impact the sound. Sometimes the director will choose not to include an audio feed at all, allocating a quicker shooting schedule with fewer takes, with the plan to record the dialogue separately (which the actors will still need to perform on location).
Reshoots and improvements
Scripts are not set in stone. Plots vary and stories evolve, so ADR permits a certain degree of creative flexibility. Even when a line changes, ADR can be used to record the new line in a studio and blend it seamlessly into the existing footage. In the same vein, performances can also change over time. Having the option to go back and tweak the vocal delivery of a scene during the editing process also grants a margin of error.
No, ADR is not the same as dubbing. A production may dub their film for a specific audience, which is usually done by a different cast, often in their own language, to make the project accessible internationally.
As with any aspect of a film, ADR may look different depending on the production setup and schedule. Normally, however, it will follow a specific pattern.
1. Prep
The sound engineer isolates the problem areas in the original on-site track, identifying which parts of the dialogue need to be re-recorded and which ones can be rescued.
2. Recording session
The actor will be invited to a recording studio where they can watch the rough cut. They will watch the track multiple times, because they will need to match lip movement and timing perfectly. The emotional side of the scene is also something that requires attention, because an actor’s expressions and physicality often inform their delivery.
3. Playback
The performer watches the footage while delivering the lines anew, making sure their synchronisation is flawless. They are given the chance to repeat the scene or snippet a handful of times to guarantee a satisfying result.
4. The edit
The new audio is edited and layered onto the footage to match the original. Further effects and other tonal tweaks may be added here, too, such as environmental noises. Music comes later.
5. Mixing
This is the final stretch of ADR. The audio engineer inserts the re-recorded track into the rest of the footage, blending the levels and ensuring a smooth and imperceptible transition between the two.
- Dress for the role. You’re about to record sound, so avoid noisy clothes. Accessories, zippers, jewellery, and stiff fabrics will all be picked up by the microphone.
- Match your physicality to the image. Your voice changes depending on your posture. If you’re recreating a scene in which you’re sitting, sit down. If you were leaning on something while you shot, try to mimic that same stance. Running and physical exertion need to be replicated. Don’t hold back! Any grunts, laughs, and breaths will need to be re-recorded too.
- Use the equipment correctly. An audio cue track will help to lock your timing to the exact lip movement. Exploit all the audiovisual aids you’re given to their full potential; they will ensure that your performance matches what you shot.
- Focus on your emotions. Step back into the mind of your character and dip into their interiority once more. It may seem difficult to isolate a single emotion in a sound booth, but matching the emotional energy of the scene is crucial.
- Embrace the retakes. This is your opportunity to polish your performance. Being asked to repeat your lines is not a critique, it’s an opportunity.