Proper lighting is never going to be what launches aspiring content creators to the top, yet poor lighting can be the thing that holds them back. Even the most engaging storytellers and knowledgeable experts can be hamstrung by shadowy, uneven setups.
Three-point lighting is the secret to transforming amateurish visuals into polished content capable of immediately establishing you as a creator to watch and a rising influencer worthy of investment. Here’s a look at it in closer detail.
JUMP TO
Three-point lighting illuminates a subject from three different lights positioned at three different points. Each light brings its own special sauce to the table. Put them all together and you have professional visuals that minimise shadows, add dimension, and make you pop.
Here’s how each one works:
1. Key light
Positioned at a 45-degree angle to yourself on either the left or right (most people elect to put the key light on their best side), this is your main light source and the most essential element of the lighting trifecta.
“If you set up your key light in the right way and position it in the right place, your videos will instantly look 80% better,” says YouTuber Oscar Owen.
2. Fill light
Positioned opposite the key light and slightly less bright, this one literally fills in the other side of your face to soften shadows without completely removing them, creating a look that’s less dramatic but more open and engaging.
“We’re not trying to create a film look,” Owen says. “We’re trying to create a friendly YouTuber look so your subscribers feel like they’re hanging out with their best friend.”
3. Back light
Sometimes called the “rim light” or “hair light,” back lights go behind and above the subject to create a subtle glow on your hair and shoulders that separates you from the background, highlights your form, and adds dimension.
“In a three-point lighting system, skipping the backlight can leave your video looking flat like a cardboard cutout instead of a real person,” Lee Jeffrey writes for Betopper stage lights.
Three-point lighting is a staple of filmmaking and photography that’s been firmly embraced by the content-creator community.
“It is one of the easiest ways to light your scene, no matter what you’re shooting for – whether it’s YouTube, or content creation, or you just like taking a lot of photos of your setup or yourself,” says tech influencer Lindseyszn.
Here’s why content creators love the three-point light system.
1. It’s simple.
Three-point lighting leaves plenty of scope for experimentation, but the fundamentals are easy enough. Since most content creators are one-man bands responsible for every part of filming, a lighting setup that demands minimal experience while offering professional-looking results is a slam dunk.
2. It’s natural.
Natural light is great – until it isn’t. Weather, the season, and the time of day can affect the quality and direction of light, which is not ideal for full-time content creators. Three-point lighting is the next best thing to the sun.
“While the sun is a single light source, it’s a very large one,” Daniela Bowker writes for Artlist. “It wraps itself around subjects very easily. Three-point lighting does a good job of emulating this natural light source.”
3. It looks professional.
Proper lighting imparts a polished appearance that followers can immediately identify, even if they can’t articulate exactly why it works. Basically, you just look the part.
Just imagine your YouTube search results show two videos on the same subject, but one appears professionally lit and the other flat and uneven. Which are you clicking?
4. It delivers results.
Numbers don’t lie. According to digital marketing agency Likeable Lab, videos with professional lighting setups typically enjoy:
45% higher watch time
38% more shares
27% increase in likes and comments
58% better conversion rates for product demonstrations
That should pique the interest of any creator, but those hoping to attract sponsors, launch their own merchandise, or especially produce paid user-generated content (UGC) will find such data particularly compelling.
“These statistics really hit home on why brands increasingly prefer working with UGC creators who demonstrate technical proficiency in their videography setup,” according to Likeable Lab.
5. It’s versatile.
Having three lighting sources to play with keeps your setup adaptable.
“Whether you’re filming a tutorial, conducting an interview, or streaming a live event, the right lighting can significantly enhance the clarity of your message and captivate your audience,” according to Cinelight.
The same holds true when switching between formats. Shorter 9:16 vertical videos, for example, can employ stronger backlighting and high-contrast lighting to create a deeper sense of dimension that helps grab the attention while scrolling.
SolidMaks/Shutterstock
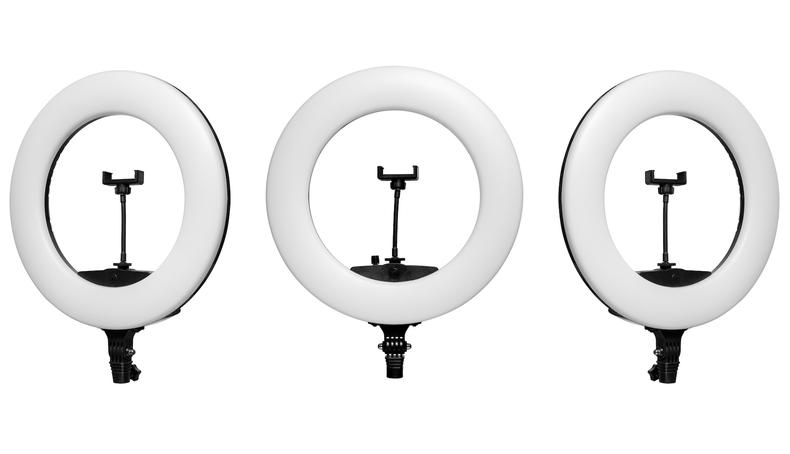
Professional lighting can be achieved without the three-point setup. The total effect may not be as striking, but using a simple ring light still takes visuals to the next level and may be preferable to three-point lighting when:
1. You’re just starting out
Three-point is straightforward and can be relatively inexpensive, but a single ring light is obviously better when you’re on a budget and producing your first pieces of content. There’s no follower count you need to hit before using either, but note how MidnightMan (260,000 subscribers) opts for a three-point setup, while Laura’s Cloud Save (27,000 subscribers) makes do with one ring light.
2. You want to flatten out imperfections
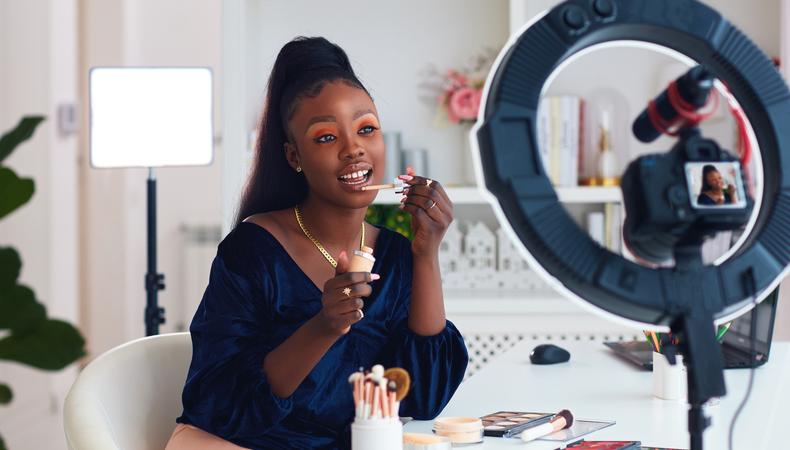
Three-point lighting accentuates the shape and form of your face, while ring lights are great for fully removing shadows and minimising imperfections such as wrinkles and pores. It can look a little unnatural, but the warm glow it provides is a good fit for things such as beauty videos where you sit close to the camera.
3. You move around a lot
Lugging around three lights is no walk in the park. Ditto having to repeatedly set them up. Ring lights are lightweight, they collapse easily, and they can be positioned in a snap.
Placing your lights correctly gets you most of the way to a tip-top setup, but there are a few more steps to hit.
1. Pick the right spot.
Try using a space with white walls – or at least a plain backdrop – and enough room to move lights around. Top UK influencer Jamie Genevieve demonstrates good use of a smaller room as her filming space.
2. Equalise temperatures.
Set each light source to the same colour temperature. Lower temperatures (2,700k to 3,200K) foster a relaxed, intimate environment, while higher temperatures (5,600 to 6,500 K) are cleaner and more neutral.
3. Prevent glare.
Adjust the angle of your lights or move freestanding reflective objects so they don’t catch the light.
Finally, don’t be afraid to experiment with light intensity, angles, distances, and brightnesses. Three-point lighting is immensely variable. The more you play around, the better you’ll be able to adapt and improve.